3D HAIR & BEARD SYSTEM

Realtime Hair Shader & Component Design

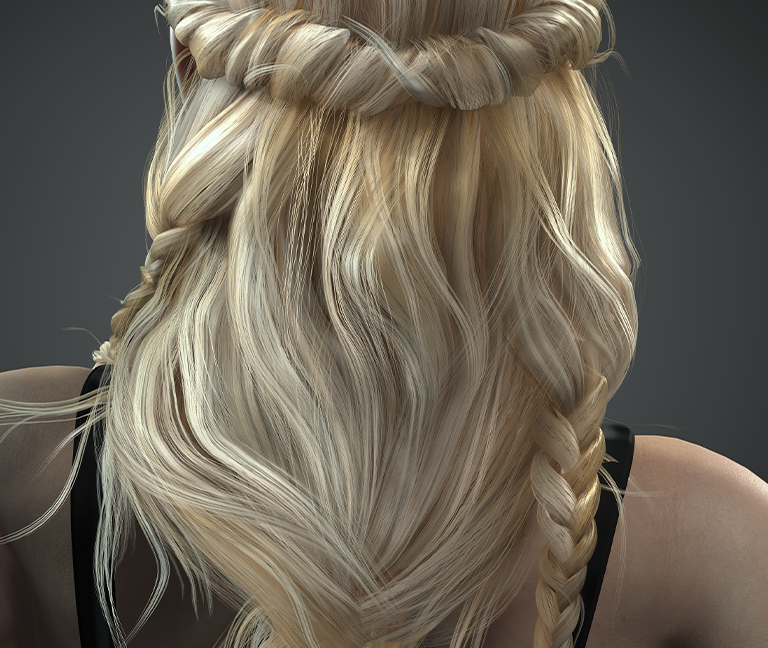
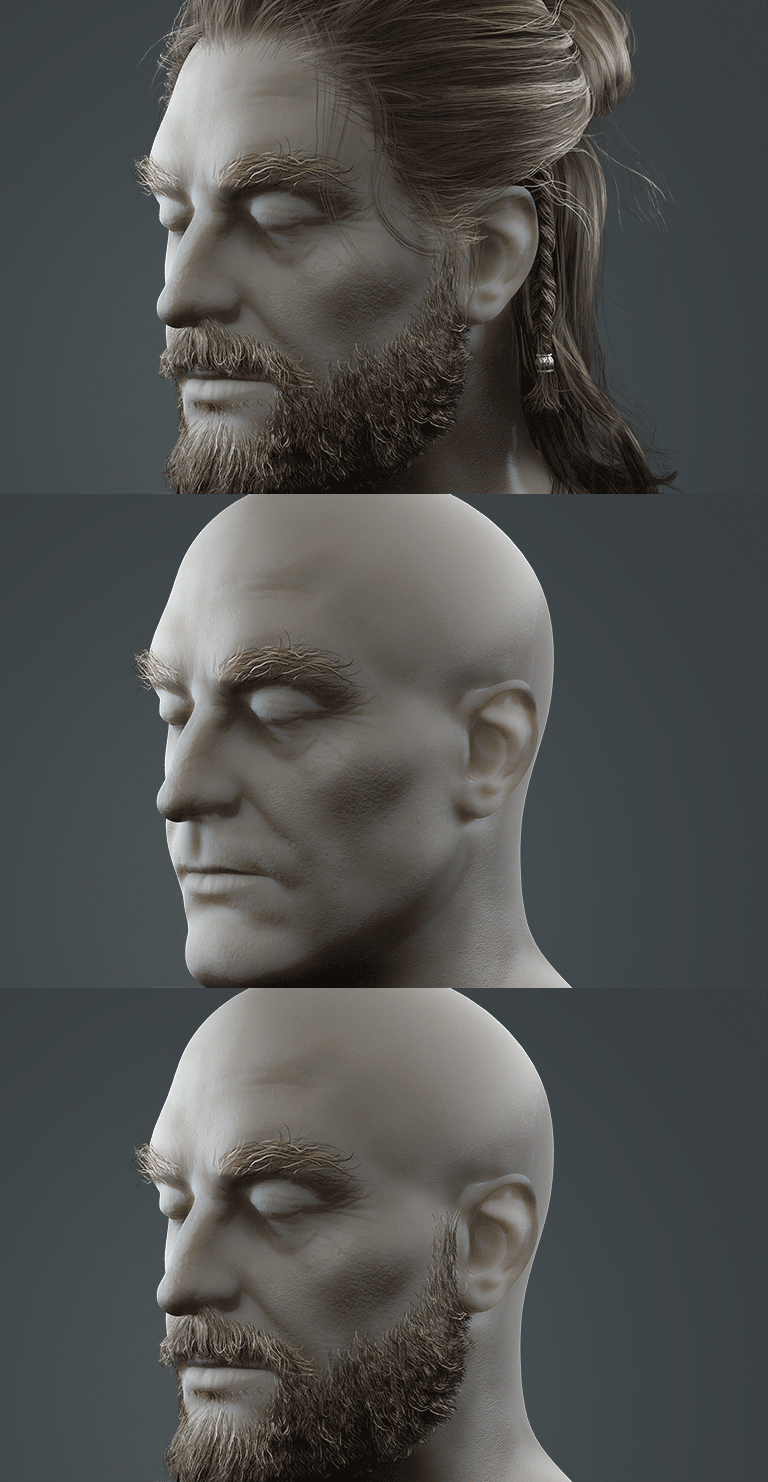
The embedded Smart Hair system is designed to provide the most realistic yet performance-friendly Hair, Brows, and Beard for digital humans in games and films. The card based hair meshes are small in size, economical in texture resolution, and efficient for real-time rendering. The highly flexible ombré color gradients and specular variation are empowered by the Smart Hair Shader. The Component Design allows you to freely assemble different hair, and beard elements into unique hairstyles. The beard and brows can dynamically conform to any facial movements.

Component Design

Easily exchange beard, brows and hair elements

Smart Hair Shader

Realistic color variation and reflection controls

Designed for Performance

Small in size, fast to load, efficent for real-time animation

v3.4 New Update! 
Newly-added - Smart Hair updates include 16 Elements (beard, hair and accessories), 8 Groups (beard, eyebrows and hair) and 3 Styles for the Component System and Smart Hair Shader design. Check Reallusion Hub to update to v3.4.
Component Design

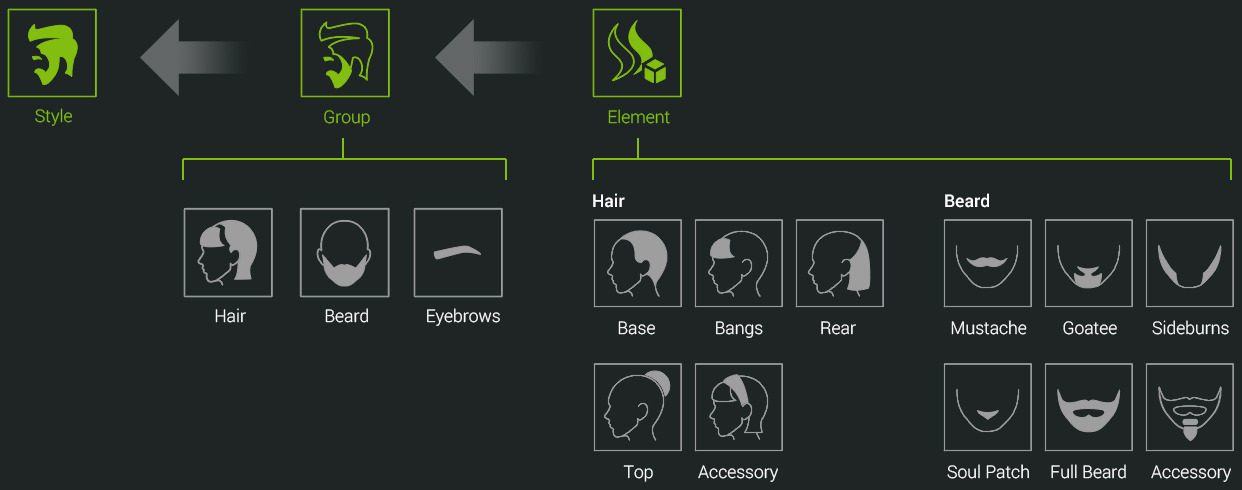
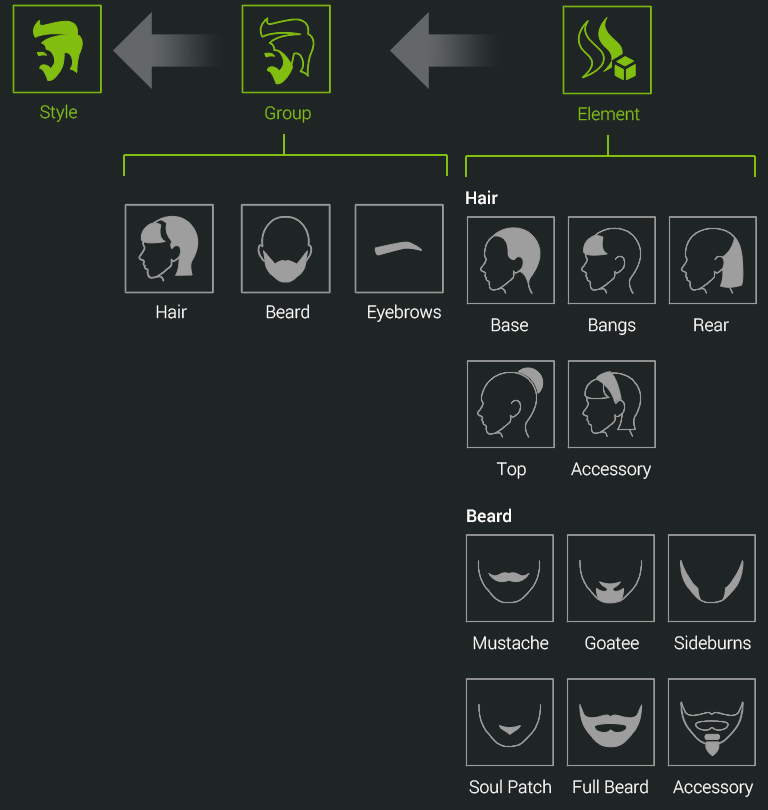
An easy and effective way to manage hair, brows and beard assets. Select and add Elements (hair parts, accessories), combine selected Elements into a Group (hair, beard, brow), and put everything together to form complete hairstyles. Group and Style items can be replaced in one-click to quickly test out. For imported assets; assign them to a corresponding facial area for appropriate surface conformation.

Facial Hair: Beard & Brows

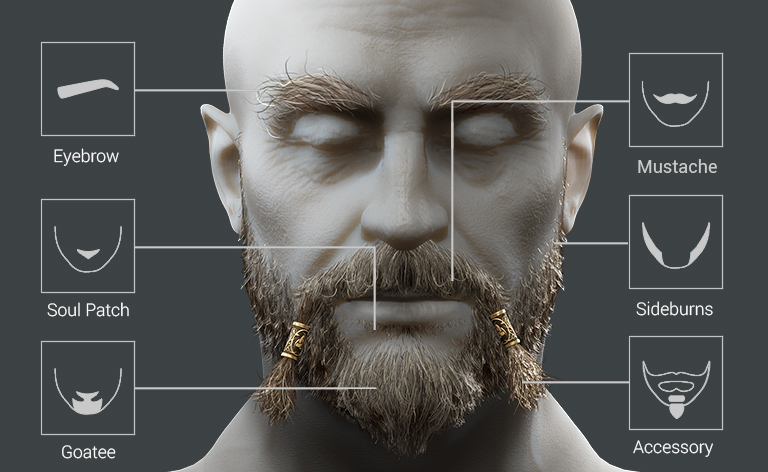
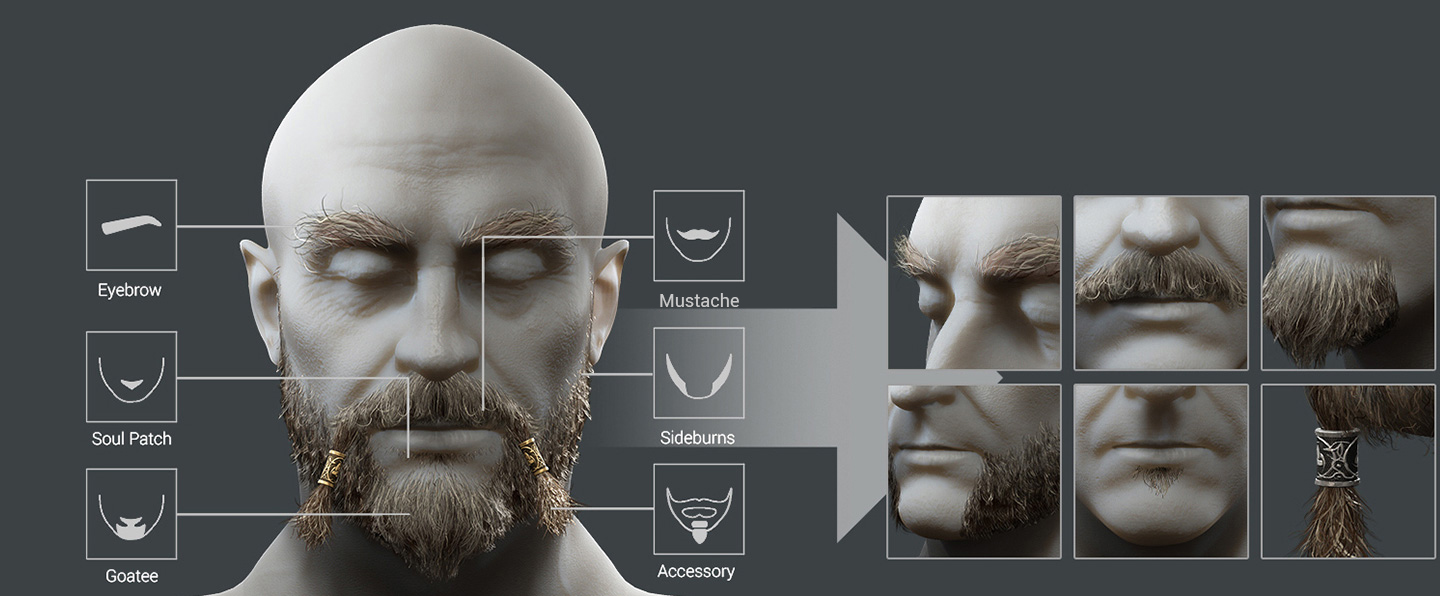
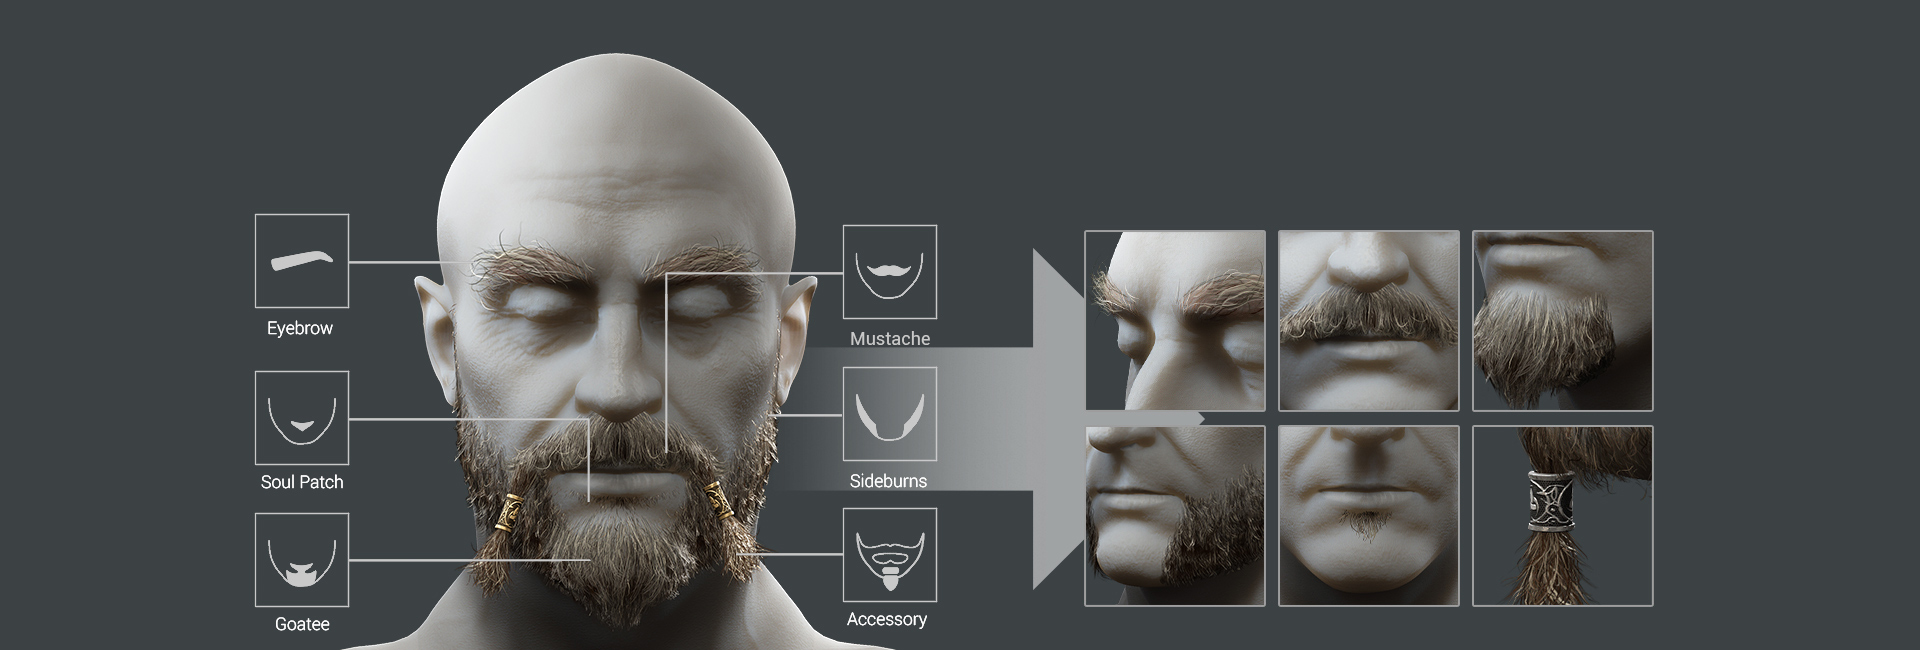
Facial Hair contains Beard and Brows. Beard is composed by Moustache, Goatee, Sideburns, Soul Patch and Accessories. Easily add or replace individual items to achieve any ideal combination. By matching brow morphs to a selected brow type it’s easy to define a coherent new character appearance.

Hair

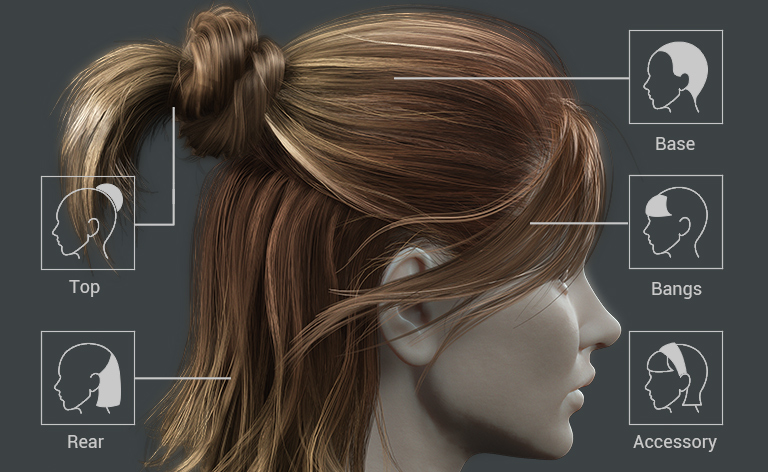
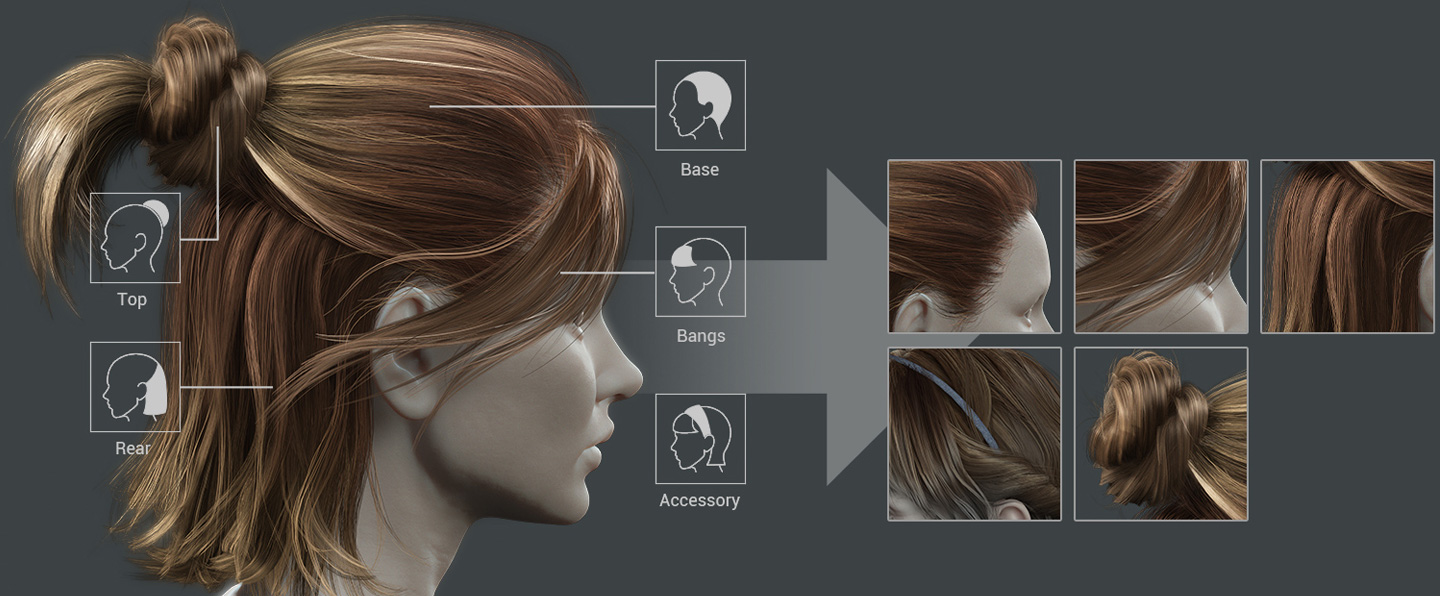
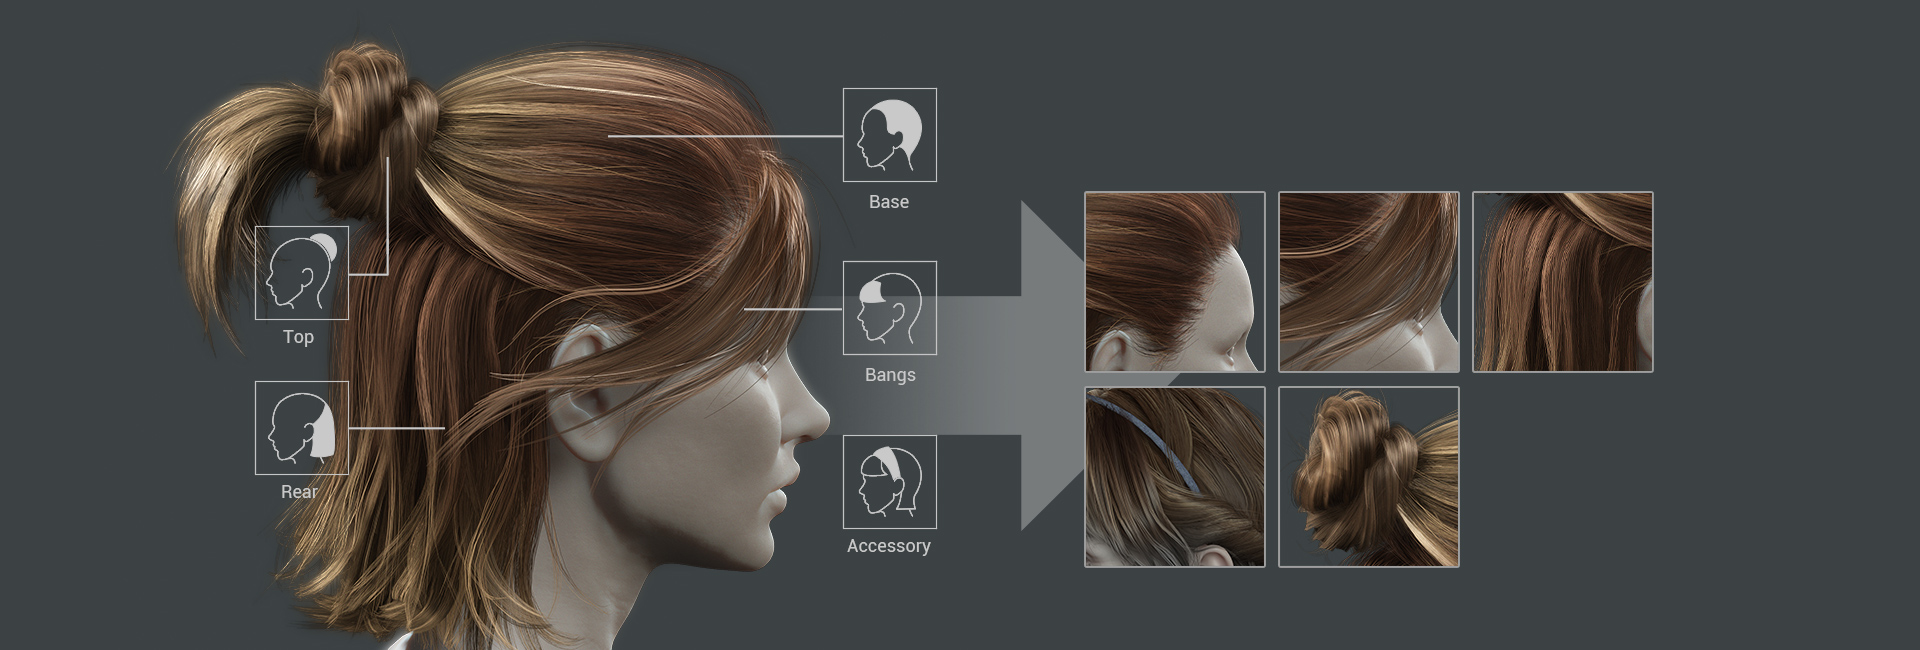
Hair is divided into Base, Top, Rear, Bangs and Accessory parts for optimal mixed style variations. Use the component design to alter character hairstyles with different fringe, rear length, or ponytail types.

Hair Patches: Morphable Scalp & Baby Hair

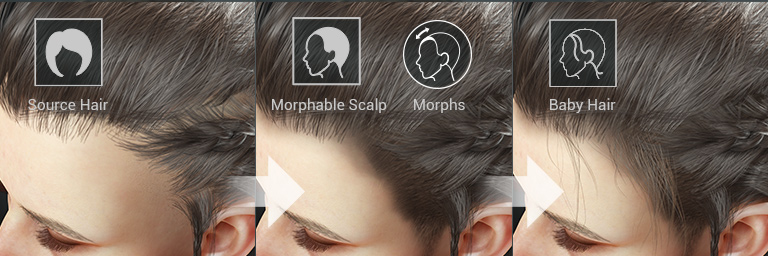
Hair Patches are designed for adding details to existing hair assets. Profoundly improve realism especially when in close-up view. Quickly patch holes or soften the hairline by matching the shape and color of the Morphable Scalp. Fill in tiny hair and wispy fuzz with the Baby Hair elements around the hairline and back of the neck.
>> Get the hair patch content from the Prime Hairstyles pack.

Smart Hair Shader
Simulate Natural Color Variation, Curvature, and Reflection

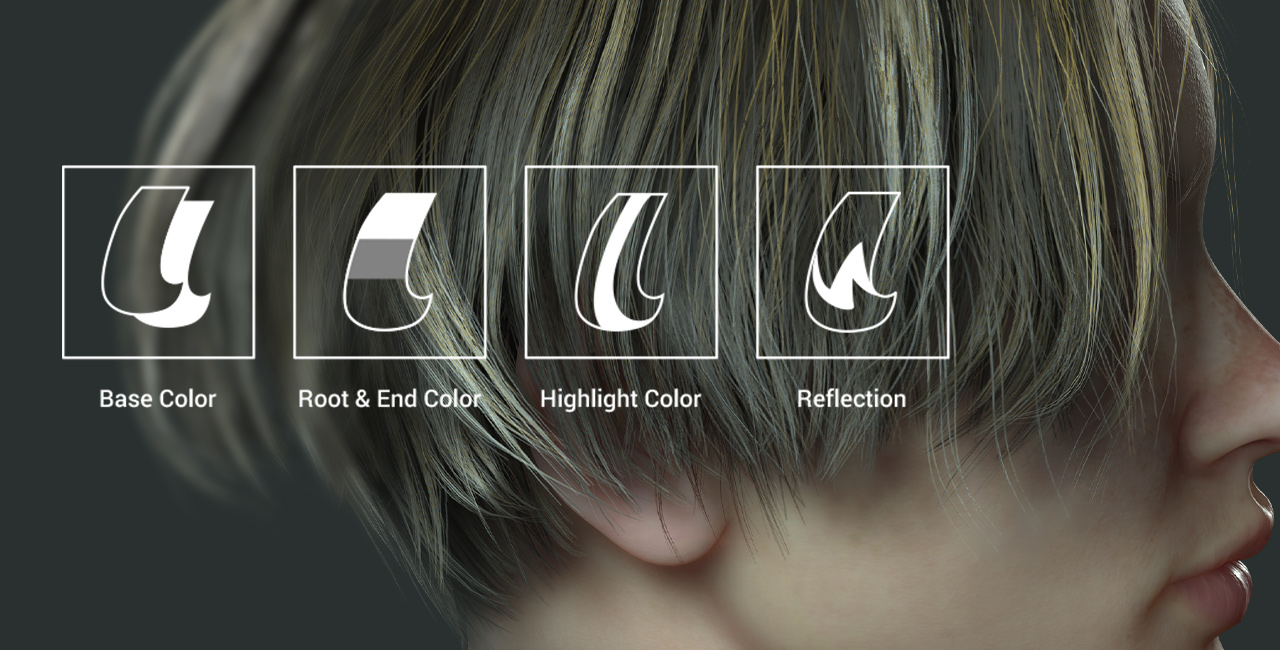
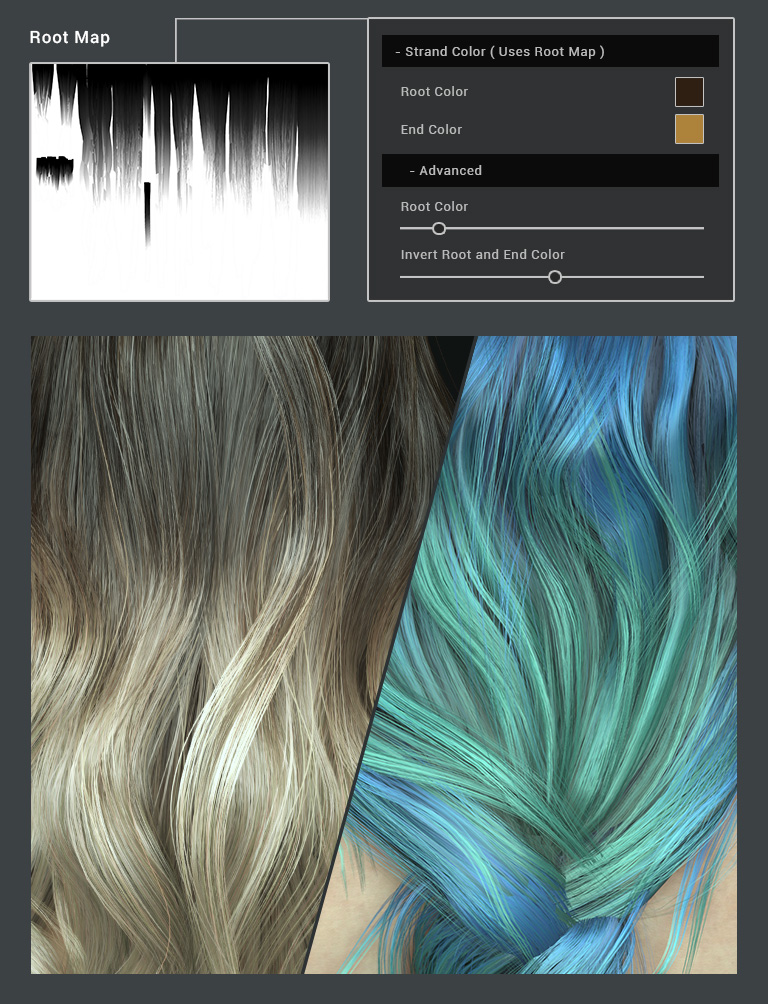
Create a multitude of natural hair looks with four powerful controls - Ombré (Root & End Color), Balayage (Highlight Color), Base Layer (Vertex Color), and Reflection (Flow Map). With these potent effects you can easily create chic or stylized hair dye, adjust to silky smooth hair reflections, simulate silver gray, or rough dry looks.

Base Color (Layering)

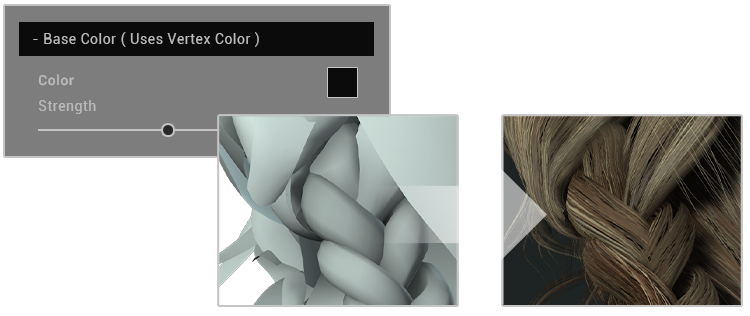
Blend with vertex color (predefined in hair meshes) for enhanced depth effect. For natural layer contrast, you can use lighter vertex color on upper layer meshes, and darker vertex color for the lower ones.
>> See Manual

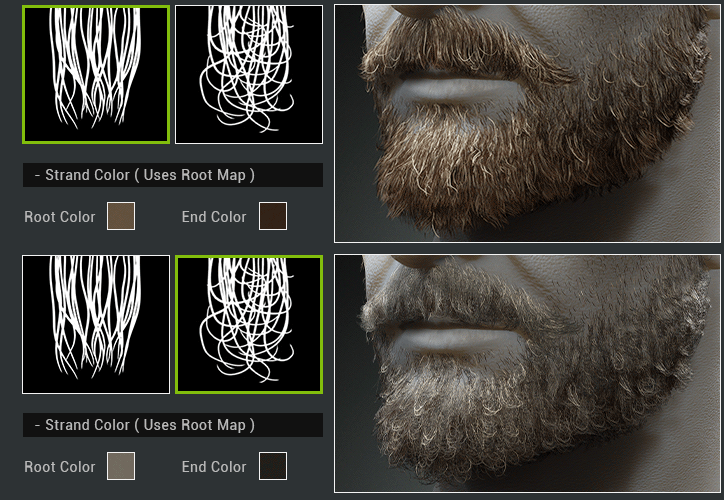
Strand Color (Root & End)

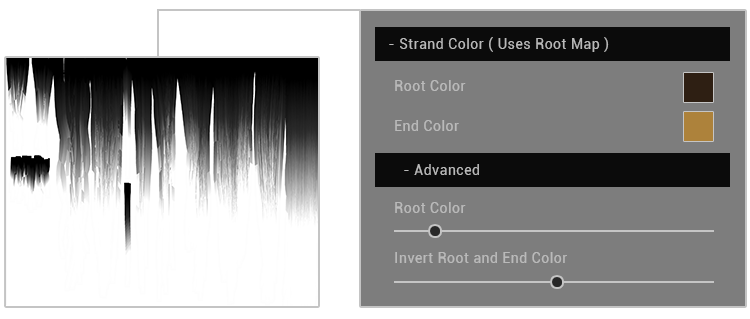
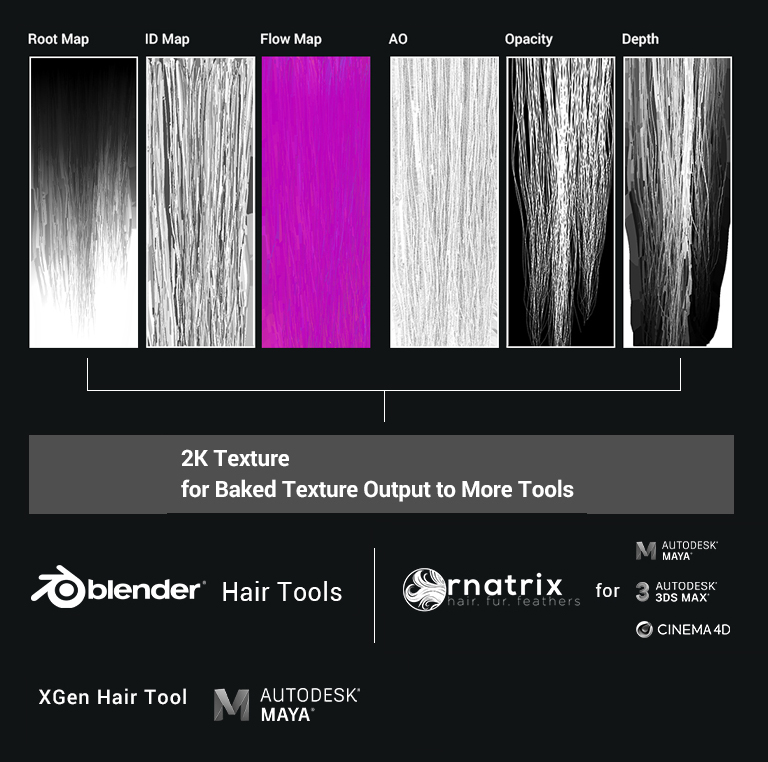
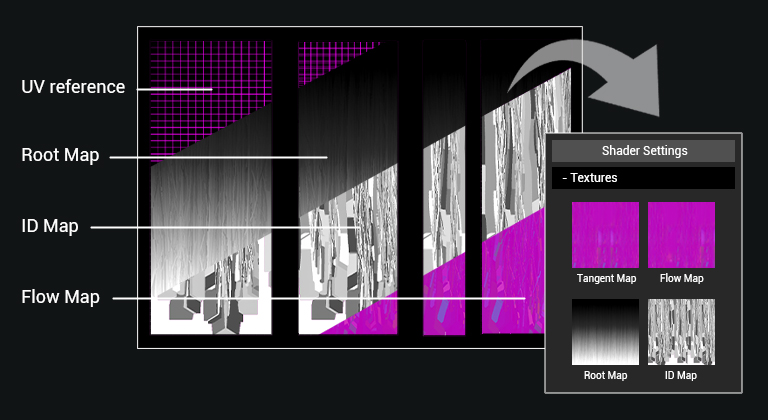
Create subtle gradual hair color fades using Root and End color, usually from darker at the roots to lighter towards the hair tips for ombré style. The strand color pattern is defined by Root Map (black-and-white), and supports major blend modes and strength control.
>> See Manual

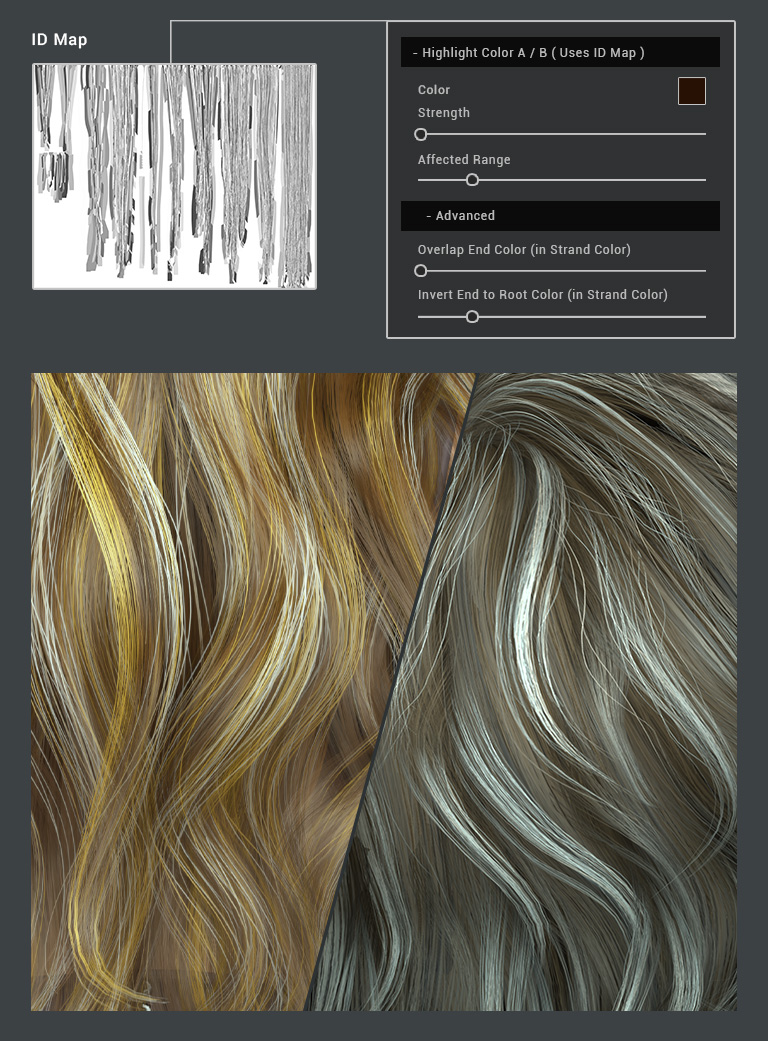
Highlight Color (Balayage)

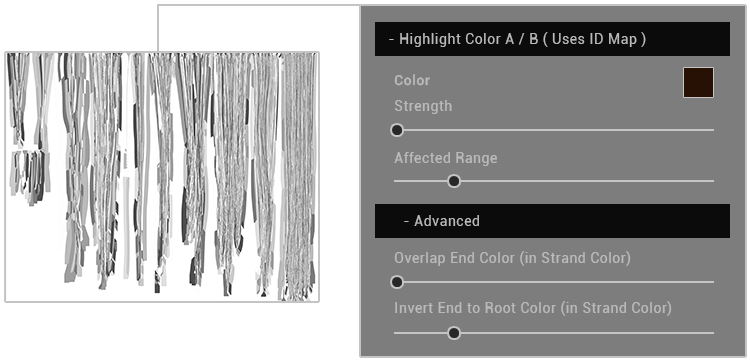
Highlight Color effect is the highlight dye hair style we see in reality, there are 2 highlight colors to blend to create more natural looks, while the ID Map controls the effect.
>> See Manual

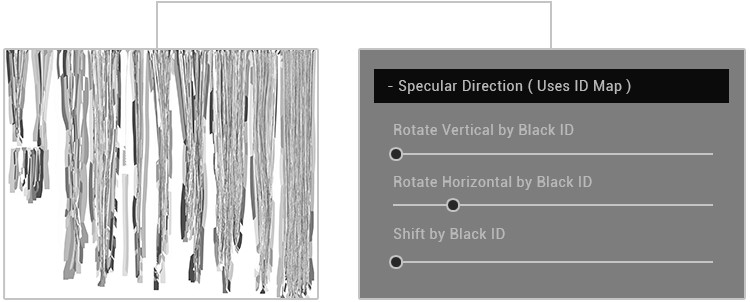
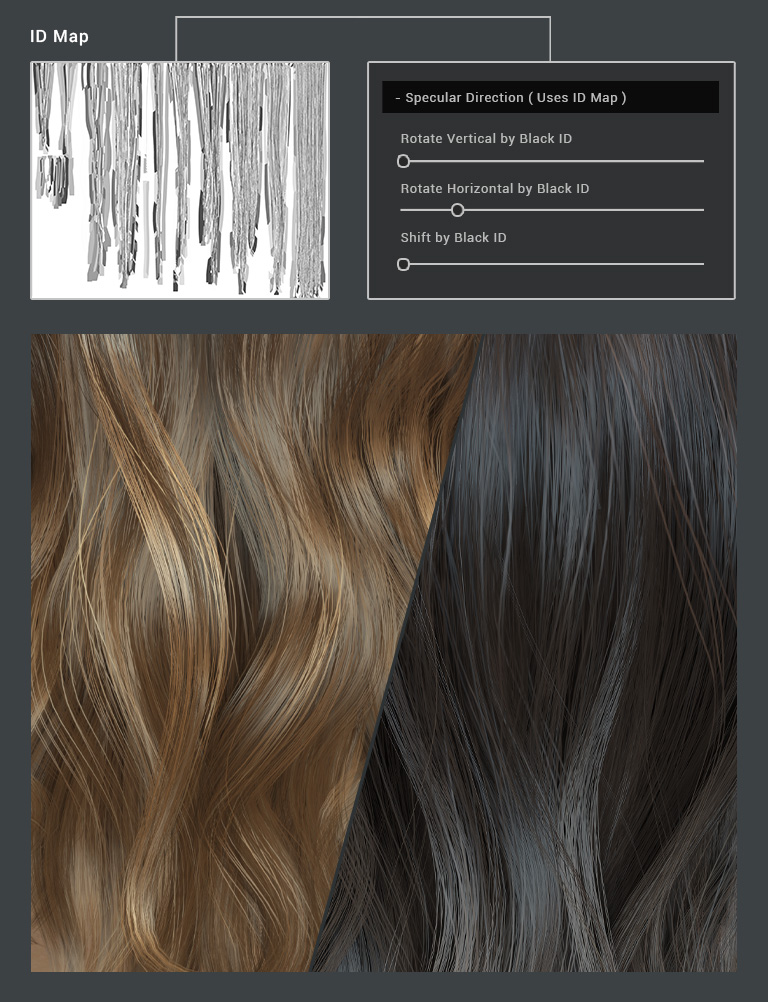
Specular Direction (Reflection)

The natural hair reflection gives characters a healthy lifelike feeling. Adjust the Specular strength, alter the Reflection Flow, or disrupt the reflective pattern to emphasize unique hairstyles. The Specular Direction control is based on ID Map.
>> See Manual

Designed for Performance

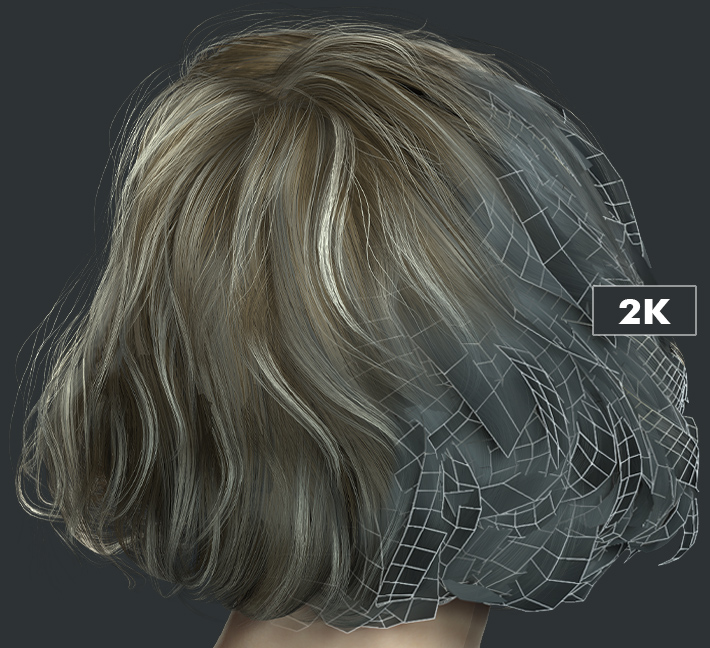
The Smart Hair System is designed for performance, the card based meshes are small in size, fast to load, and efficient for real-time animation. One complete hair set takes merely hundreds or thousands of polygons, while using optimal texture sizes (hair 2K, beard 1K).

By utilizing minimal resources you can achieve high visual realism with sophisticated coloring, and adjustable reflection through the real-time shader.

CONFORMS WITH FACIAL MOVEMENT

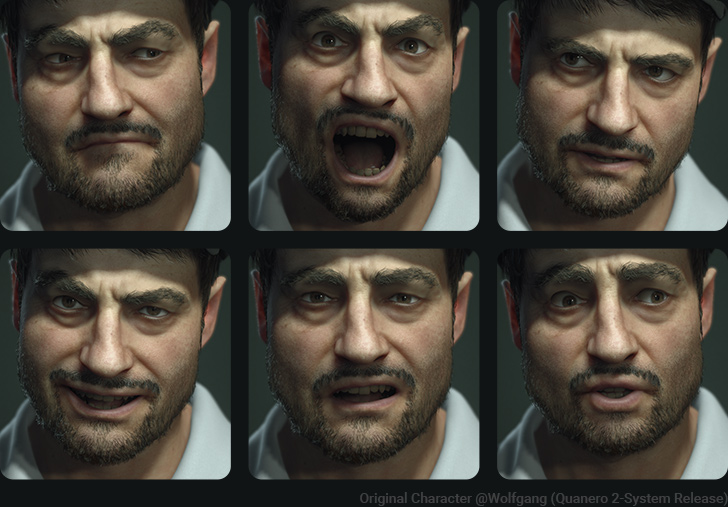
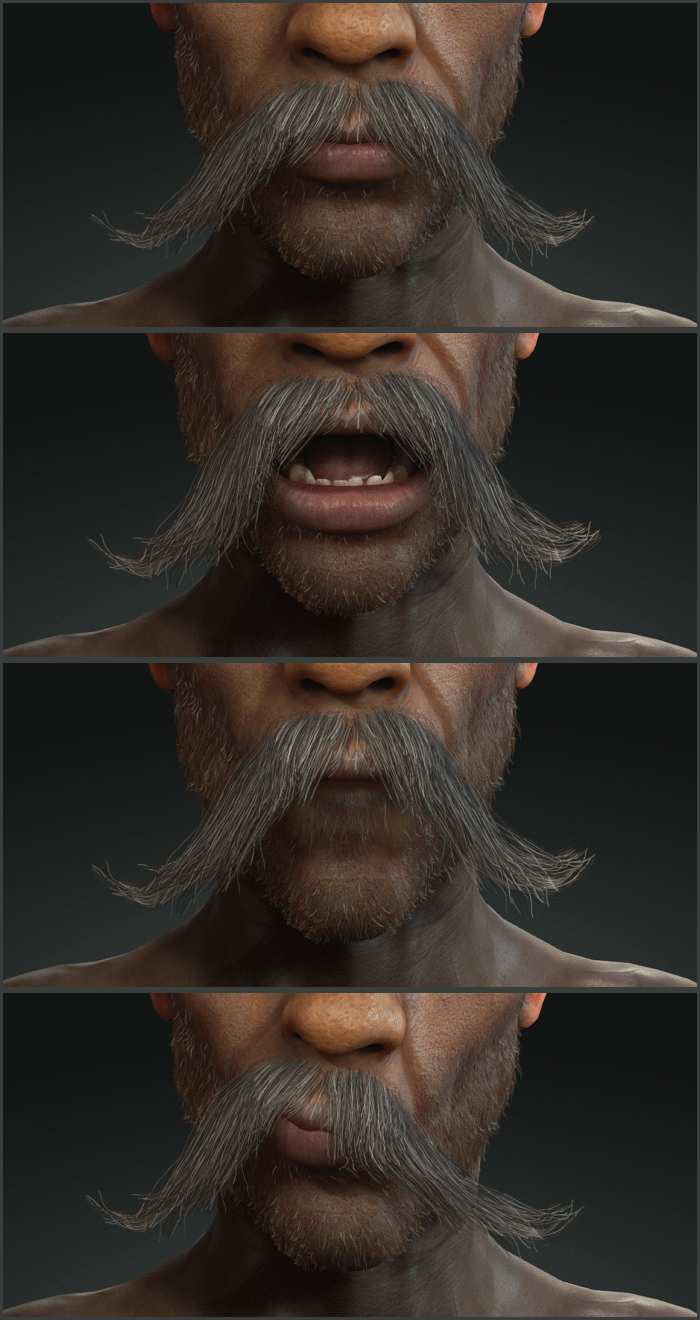
The Smart Hair Beard and Brows can perfectly follow animated facial surfaces for any real-time performance.

● Works in real-time for facial morphs, lipsync animation, facial motion capture, or intensive expression change with the Face Puppet.

● Fine-tune the shape and position with the Mesh Editor.

● Export as FBX blendshapes for game engines and 3D rendering.

PIPELINE: CREATE NEW & ENHANCE EXISTING HAIR
Compatible with Major Hair Tools

Reallusion's Smart Hair System is compatible with major 3D hair design solutions like Ornatrix (for Maya, C4d, Max), XGen, and Blender Hair Tools (plugin) as long as they can export card based hair meshes (obj, fbx) and generate the below texture maps for shader effects.
>> Explore more: Blender Hair Tool Tutorial

Enhance Existing Hair

You can convert existing hair assets as Smart Hair Components, or upgrade the rendering with the Smart Hair Shader by adding required effect maps.
>> See Tutorial

EXPORT COMPATIBILITY

Smart Hair supports direct shader compatibility with Unreal engine. With one-click you can transfer hair assets through the Auto Setup, while keeping the identical feature adjustment. For Unity and other 3D tools, you can choose to bake shader effects to PBR textures for rendering.

CUSTOM SKIN WEIGHT

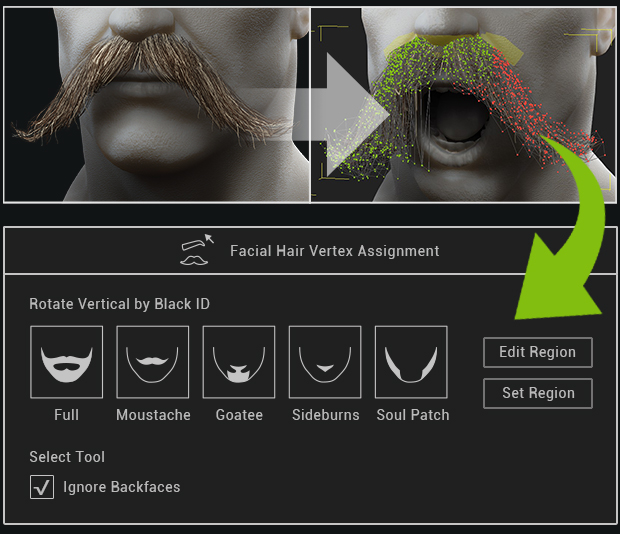
The beard and brow elements are designed to move along with their corresponding facial vertices, however when bringing in new items which have far reaching vertices detached from the facial surface, users can use the Vertex Assignment tool to define the target following area to avoid from mesh stretches or poke through when animating the face.
>> see Manual

The beard and brow elements are designed to move along with their corresponding facial vertices - however when bringing in new items which have far reaching vertices detached from the facial surface, users can use the Vertex Assignment tool to define the target following area to avoid mesh stretches, or poke through, when animating the face.
>> see Manual