NON-DESTRUCTIVE WORKFLOW FOR STUNNING VISUALS
INTUITIVE & FAMILIAR LAYER EDITING
SkinGen Editor let you freely stack skin materials made by Substance, and control the blend options between layers like Photoshop.
-
Content Manager
Browse and manage skin and makeup content, drag-and-drop assets to the SkinGen layer editor for compositing effects.
-
Layer Editing
Show/hide, opacity level, blend modes, layer order, merge and flatten
-
Dynamic Material Editing
Change material attributes for color, transformation, tiling and distribution, etc.
-
Custom Textures
Create unique effects from custom image imports, define effective range via alpha images or ColorID maps (SkinGen Premium PlugIn required)
Flexible Adjustments on Each Layer
All skin or makeup effects are generated by SkinGen and have their own editors which are based on the same design structure, including texture, transform, and material adjustments. They also have specific functions for different effects like multiple effect areas, random sliders…etc.. Let’s take a look at the brand new powerful SkinGen editor!
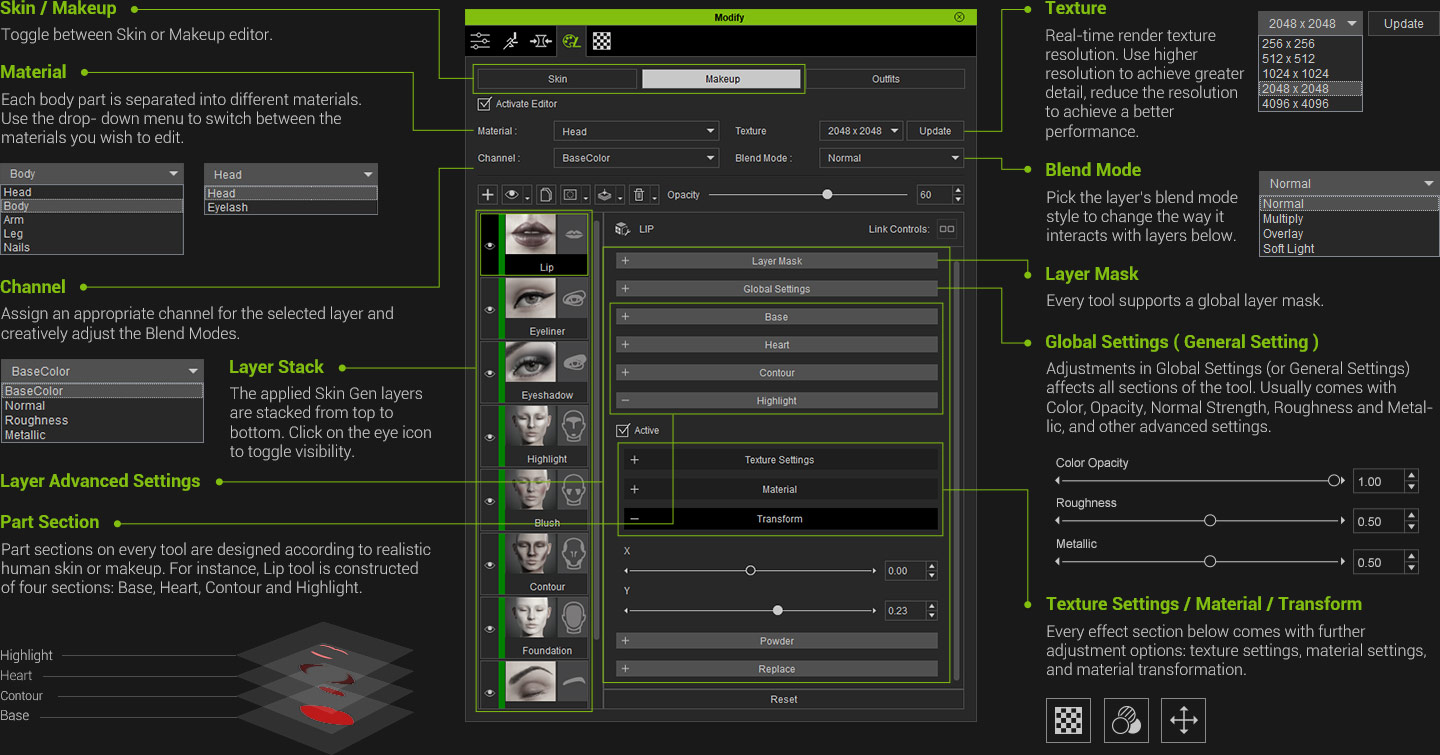
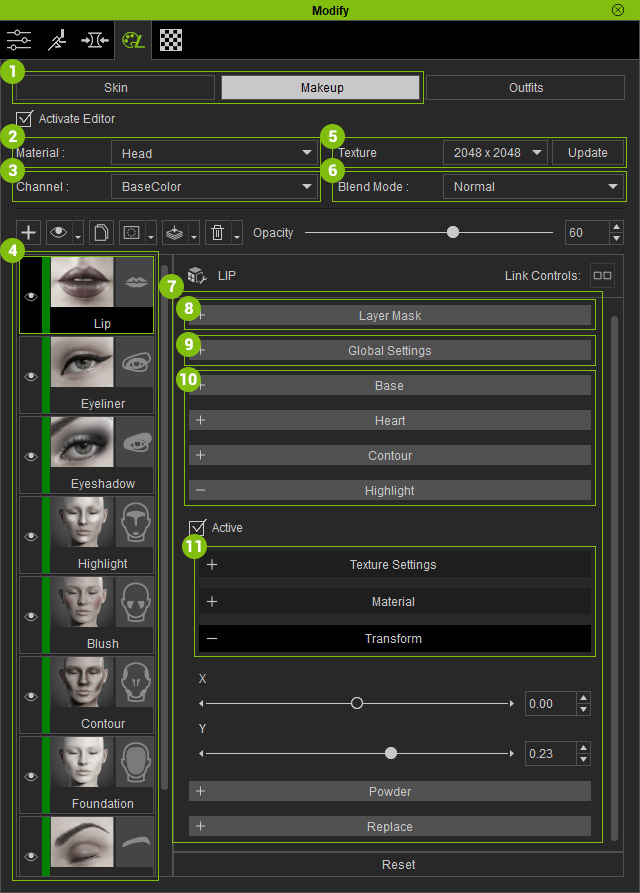
1. Skin / Makeup
Toggle between Skin or Makeup editor.
2. Material
Each body part is separated into different materials. Use the drop- down menu to switch between the materials you wish to edit.
3. Channel
Assign an appropriate channel for the selected layer and creatively adjust the Blend Modes.
4. Layer Stack
The applied Skin Gen layers are stacked from top to bottom. Click on the eye icon to toggle visibility.
5. Texture
Real-time render texture resolution. Use higher resolution to achieve greater detail, reduce the resolution to achieve a better performance.
6. Blend Mode
Pick the layer’s blend mode style to change the way it interacts with layers below.
7. Layer Advanced Settings
8. Layer Mask
Every tool supports a global layer mask.
9. Global Settings ( General Setting )
Adjustments in Global Settings (or General Settings) affects all sections of the tool. Usually comes with Color, Opacity, Normal Strength, Roughness and Metallic, and other advanced settings.
10. Part Section
Part sections on every tool are designed according to realistic human skin or makeup. For instance, Lip tool is constructed of four sections: Base, Heart, Contour and Highlight.
11. Texture Setting / Material / Transform
Every effect section below comes with further adjustment options: texture settings, material settings, and material transformation.
Alter Layer Stack Orders for Variation
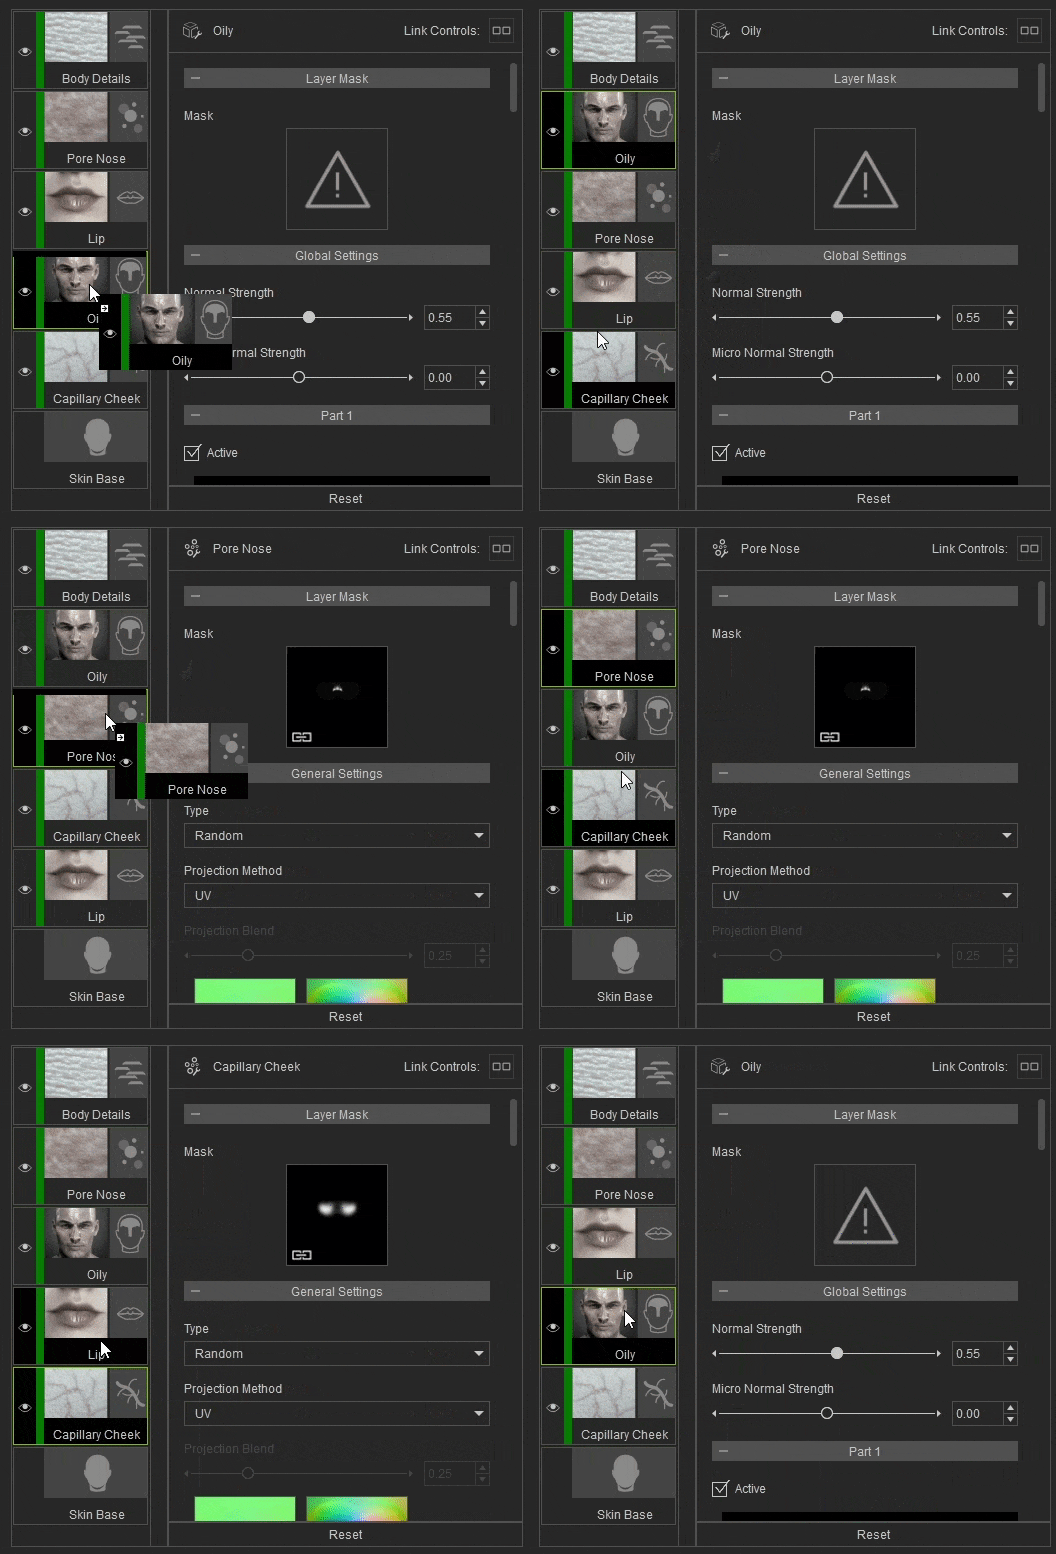
Toggle on/off a selected item, or rearrange its layer order simply by dragging it there.
Adjust the layer order for the correct result
Switch layer order to get different effects
Blend Modes for Layer Effects
Mixing and blending effects with the layer stack is possible with SkinGen Blend Modes. The Blend Modes behave just like in Photoshop with the ability to add enhanced effects to the character materials and actively blend to the desired result. Combine layer blend modes for an array of of cosmetic and skin effects.
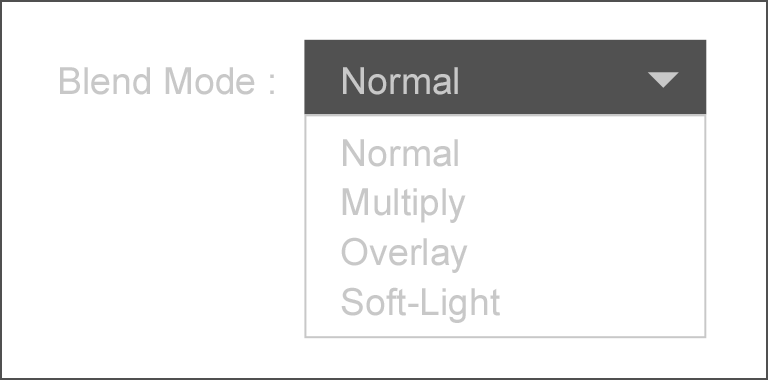
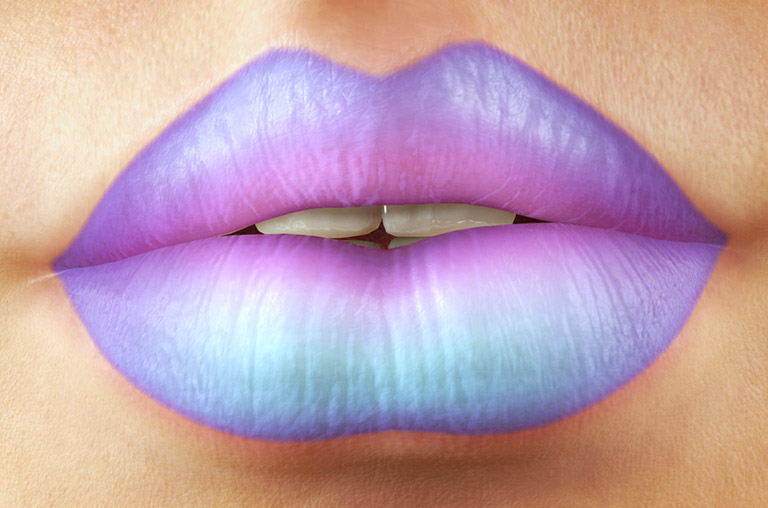
Normal
Normal is the default Blending Mode, like Photoshop. Opaque pixels will cover the pixels directly below them.
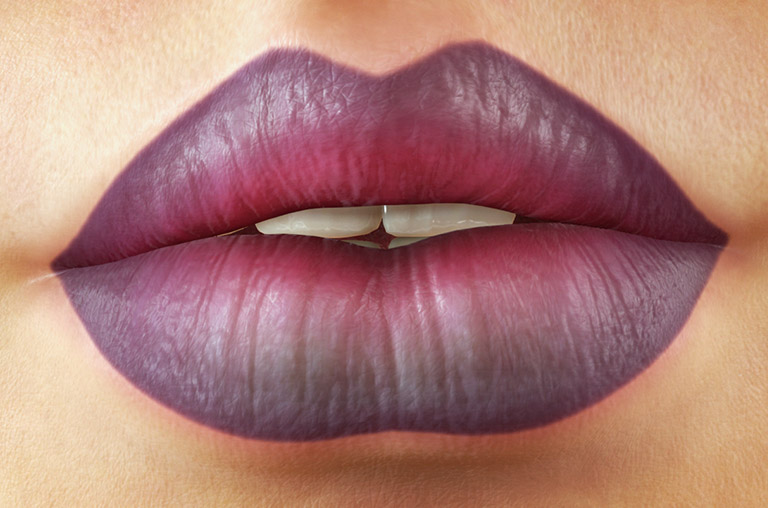
Multiply
Multiplies the luminosity of the base color by the blend color. The resulting color is always a darker color. White produces no change, while the black pixels remain.
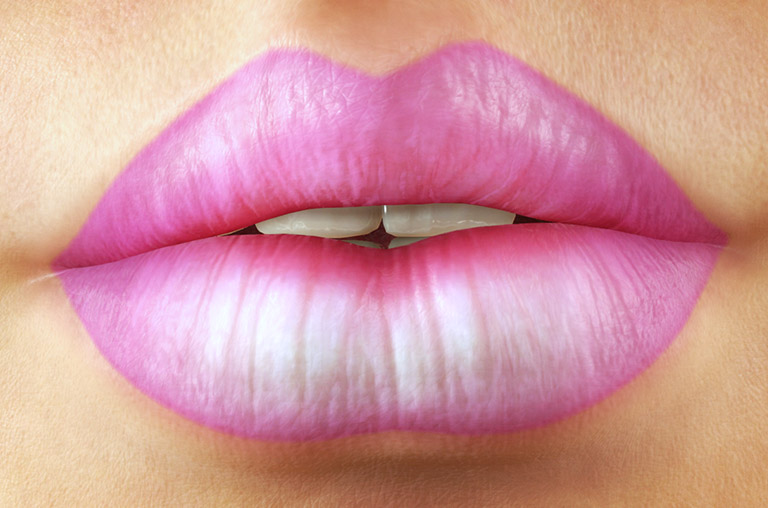
Overlay
Overlay combines Multiply and Screen blend modes. The parts of the top layer where the base layer is light become lighter, the parts where the base layer is dark become darker.
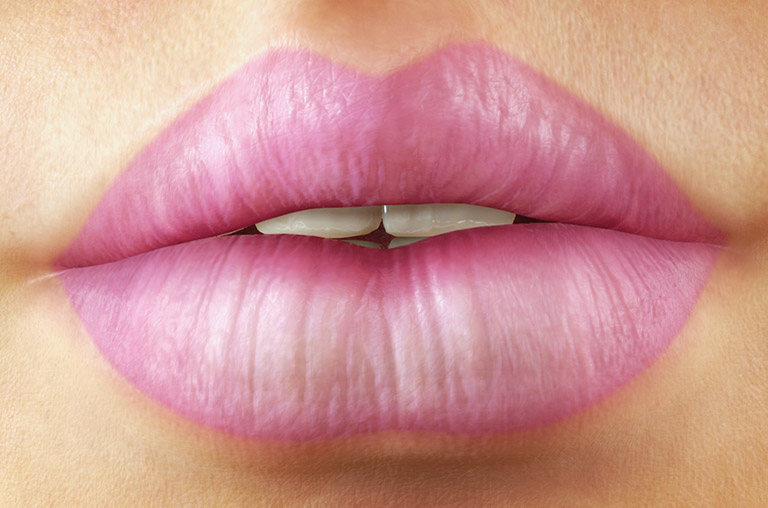
Softlight
Darkens or lightens the colors, depending on the blend color. The effect is similar to shining a diffused spotlight on the image.
PERFORMANCE DESIGN
The need for layers and resolution never ends, SkinGen has provided several ways to make the most of computing resources to help get things done in a smart and efficient way.
Edit in Lower Resolution
Get 4K High-Quality result
If you feel the operation is getting slower while working with a high-res multi-layer project, consider switching to a lower resolution (eg. 1024 x 1024), and switch back to the higher resolution after adjustments are done.
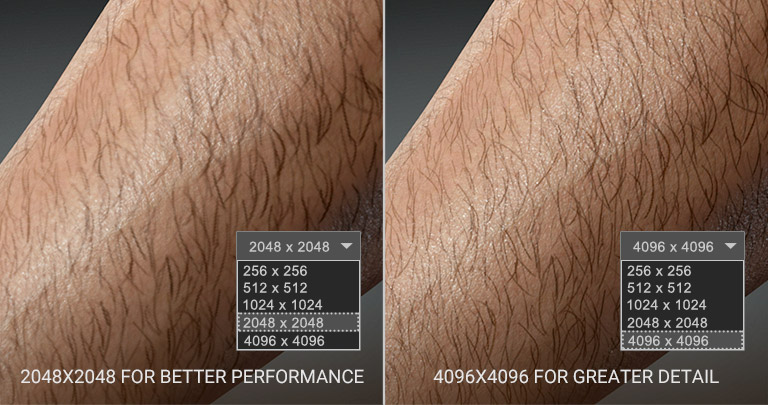
High-res Editing Only on the Working Material
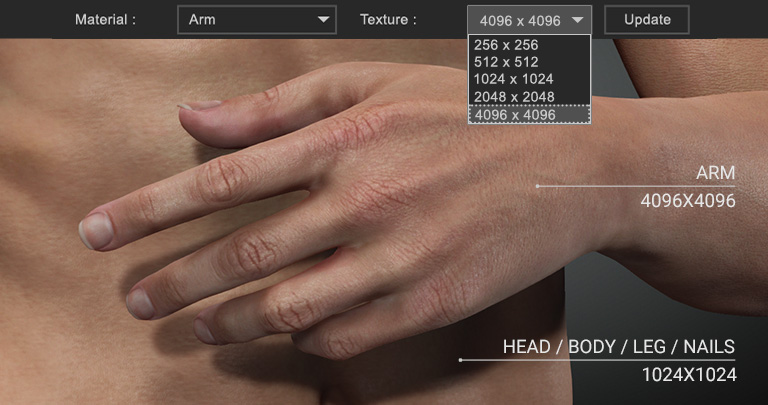
Head, torso, arms, legs, each material can be edited separately allowing the option to set high-resolution on the working material, while keeping other materials remaining on lower resolution. Once satisfied, press “update” to sync the edited result to other materials.
Layer Features to Lift Performance
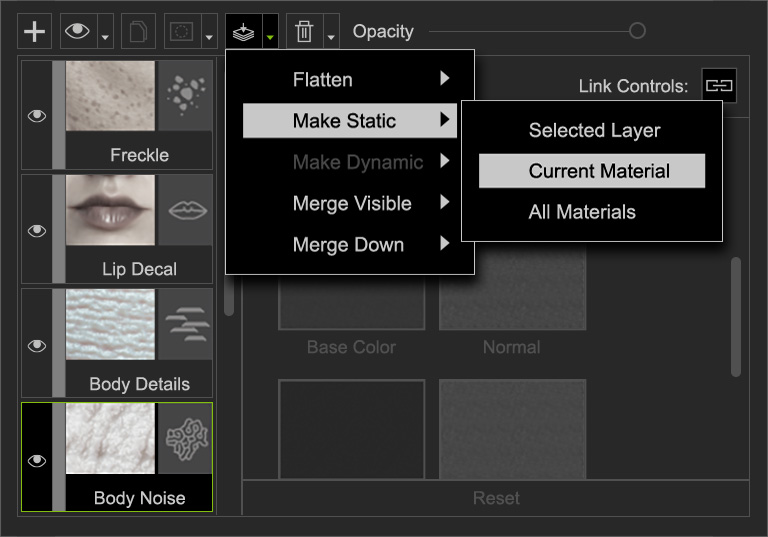

Make Static
To reserve some system performance, temporarily set layers to static mode. Once you wish to re-edit them, just make them dynamic again.
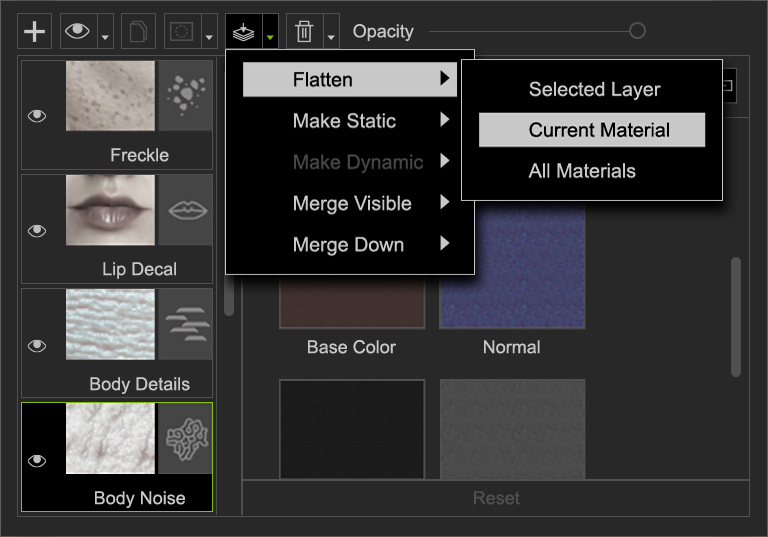

Flatten
Once editing is complete, choose Flatten to collapse the selected dynamic layers to a baked image layer. It greatly helps to speed up the SkinGen mode switch.
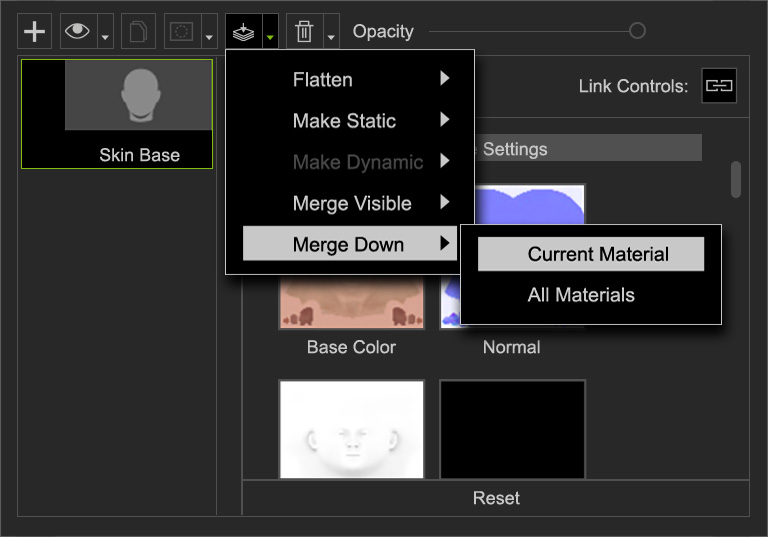

Merge
Merging layers not only releases most system memory, it turns all dynamic layers to baked textures which are stored in the Skin Base. Use merge to break the maximum layer cap, and add more effects.

